# more /etc/sysconfig/network-scripts/ifcfg-eth0
HWADDR=00:50:56:XX:XX:XX
NAME=eth0
DNS1=192.168.xxx.xxx
DNS2=10.82.xxx.xxx
DOMAIN="midominio.com"
DEVICE=eth0
ONBOOT=yes
USERCTL=no
BOOTPROTO=none
check_link_down() {
return 1;
}
TYPE=Ethernet
DEFROUTE=yes
IPV4_FAILURE_FATAL=no
IPV6INIT=no
UUID=5fb06bd0-0bb0-7ffb-45f1-d6edd65xxxxx
IPADDR=10.150.xxx.xxx
PREFIX=16
GATEWAY=10.150.yyy.yyy
# nmcli con mod eth0 ipv4.gateway 10.150.zzz.zzz
# nmcli con up eth0
Connection successfully activated (D-Bus active path: /org/freedesktop/NetworkManager/ActiveConnection/2)
# ip r
default via 10.150.zzz.zzz dev eth0 proto static metric 100
10.150.0.0/16 dev eth0 proto kernel scope link src 10.150.xxx.xxx metric 100
miércoles, 15 de junio de 2016
Modificar la precedencia de IPv6 a IPv4
Nota: Para cambiar la precedencia de IPv6 por IPv4 tenemos que crear (si no existe) el fichero /etc/gai.conf
# vi /etc/gai.conf
precedence ::ffff:0:0/96 10
POR
precedence ::ffff:0:0/96 100
Si cambiamos la el valor 10 por 100 IPv4 tendra precedencia a IPv6. Esto soluciona problemas como que un Apache Tomcat resuelva el localhost de IPv6 antes que el de IPv4
Ver nota: Prefer IPv4 over IPv6 in dual-stack environment (http://sf-alpha.bjgang.org/wordpress/2012/08/linux-prefer-ipv4-over-ipv6-in-dual-stack-environment-and-prevent-problems-when-only-ipv4-exists/)
Boot en Single User Red Hat 7
Durante el proceso de boot, en el GRUB ejecutamos e
GRUB: e
Buscamos el texto rhgb quiet y lo reemplazamos con init=/bin/bash
linuxefi ...... rhgb quiet -> init=/bin/bash
Presionamos ctrl+x para finalizar la edision.
ctrl+x
Montamos el FS de root como RW
# mount -o remount,rw /
... REALIZAMOS EL MANTENIMIENTO...
Ej:
# passwd root
[Enter New Password]
[Re-enter New Password]
Para finalizar ejecutamos un relabel del contexto de SELinux
# touch /.autorelabel
Arrancamos el equipo
# exec /sbin/init
Procedimiento para habilitar acceso via SSH/SFTP sin Password a un host remoto
Nos logueamos con el usuario que realizara la conexion
root # su - miusuario
miusuario $ cd ~/.ssh
miusuario $ vi config
Host remotehost
HostName remotehost
User sftp_globalia
IdentityFile ~/.ssh/id_rsa
miusuario $ sftp remotehost
Connected to remotehost.
sftp> ls -la
drwxr-xr-x 5 0 0 4096 Nov 27 08:03 .
drwxr-xr-x 5 0 0 4096 Nov 27 08:03 ..
drwx------ 2 1087 1087 4096 Nov 27 08:14 .ssh
drwxrwx--- 6 1087 1087 4096 May 12 00:00 input
drwxrwx--- 6 1087 1087 4096 May 12 00:00 output
sftp> quit
Assembling Partitions as RAID Devices
Instalamos el SW
# yum install -y mdadm
o
# apt-get install mdadm
Creamos el RAID
# mdadm --create --verbose /dev/md0 --level=mirror --raid-devices=2 /dev/sdb1 /dev/sdc1
mdadm: size set to 96128K
mdadm: Defaulting to version 1.2 metadata
mdadm: array /dev/md0 started.
Nota: that if the partitions you are using contain file systems, you are prompted to
confirm your intention to use them in a RAID device.
Verificamos el estado del mismo
# mdadm --detail /dev/md0
/dev/md0:
Version : 1.2
...
Number Major Minor RaidDevice State
0 8 17 0 active sync /dev/sdb1
1 8 33 1 active sync /dev/sdc1
Verificamos los diferentes raids detectados
# mdadm --detail --scan
ARRAY /dev/md/0 metadata=1.2 name=localhost.localdomain:0 UUID=5fd97b87:18209d2d:ac07e389:4fb93cfe
Actualizamos el archivo de configuracion
# mdadm --detail --scan >> /etc/mdadm/mdadm.conf
Operating systems using SystemD:
# systemctl start mdmonitor (or alternatively, mdmonitor.service)
# systemctl enable mdmonitor
Operating systems using SysVinit:
# service mdmonitor start
# chkconfig mdmonitor on
Eliminar Mensaje "kernel:BUG: soft lockup" en Linux RHEL7
Verificar si se produce el evento de "kernel:BUG: soft lockup"
# dmesg | grep soft
Verificar el limite utilizado por el watchdog
# cat /proc/sys/kernel/watchdog_thresh
60
Cambio en caliente del limite utilizado
echo 60 > /proc/sys/kernel/watchdog_thresh
Cambio en permanente del limite utilizado
# vi /etc/sysctl.conf
kernel.watchdog_thresh = 60
Informacion adisional
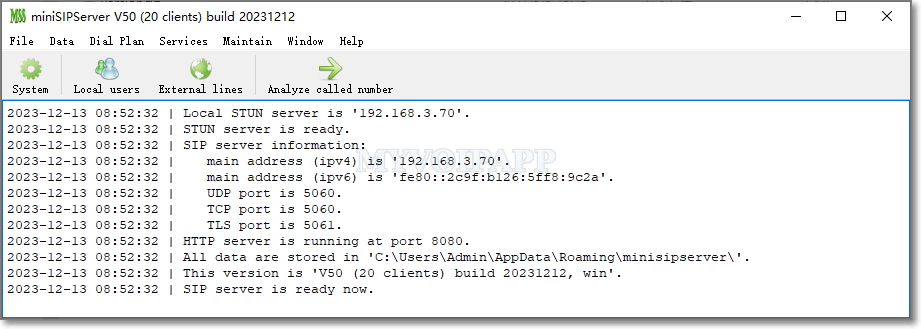
Voz sobre IP, Mini SIP Server (Simpe, potente y fiable)
Buenas nuevamente después de tanto tiempo!!!
Recientemente, tuve la necesidad de instalarme un server SIP, la verdad hace tiempo incursione con Asterix y otros productos la mayoría muy buenos pero difíciles de configurar. Luego encontré miniSIPServer que es multiplataforma, se puede obtener una licencia free (*) del producto y prácticamente con cero configuración.
La verdad es que el producto es muy bueno y simple de gestionar, quien este buscando algo similar free o de bajo coste, no duden en probar este producto.

Mas Info:
Site : https://www.myvoipapp.com
Download: https://www.myvoipapp.com/download/
Features: https://www.myvoipapp.com/minisipserver/index.html
* License : https://www.myvoipapp.com/blog/tag/free/
Mariano
Recientemente, tuve la necesidad de instalarme un server SIP, la verdad hace tiempo incursione con Asterix y otros productos la mayoría muy buenos pero difíciles de configurar. Luego encontré miniSIPServer que es multiplataforma, se puede obtener una licencia free (*) del producto y prácticamente con cero configuración.
La verdad es que el producto es muy bueno y simple de gestionar, quien este buscando algo similar free o de bajo coste, no duden en probar este producto.
Main window (Windows)
Main window (Linux)
Mas imágenes en https://www.myvoipapp.com/minisipserver/screens.html
Mas Info:
Site : https://www.myvoipapp.com
Download: https://www.myvoipapp.com/download/
Features: https://www.myvoipapp.com/minisipserver/index.html
* License : https://www.myvoipapp.com/blog/tag/free/
Mariano
Suscribirse a:
Entradas (Atom)

